Showing posts with label mod podge. Show all posts

Saturday, May 5, 2012

Mod Podged Picture Frame


Happy Cinco de Mayo! As promised, I have a new post this week.  And a doozie of a story.  I bought a $1 picture frame from Michaels a few months ago, and my plans for it have changed four times now.  Let me walk you through my mind...

1. I was going to use comic strips to decorate it.  Have them overlapping, a cool collage.  This will probably happen in the future, but collecting the comics was getting moderately daunting.
2. I decided that I wanted to use it somehow in my future classroom, so I found a bunch of inspirational education quotes.  I was going to mod podge them onto it, then have my "teacher rules" in it.  I love it when teachers display what rules they'll follow (e.g. I will respect you, I will put in my most effort to reach your needs, etc.).
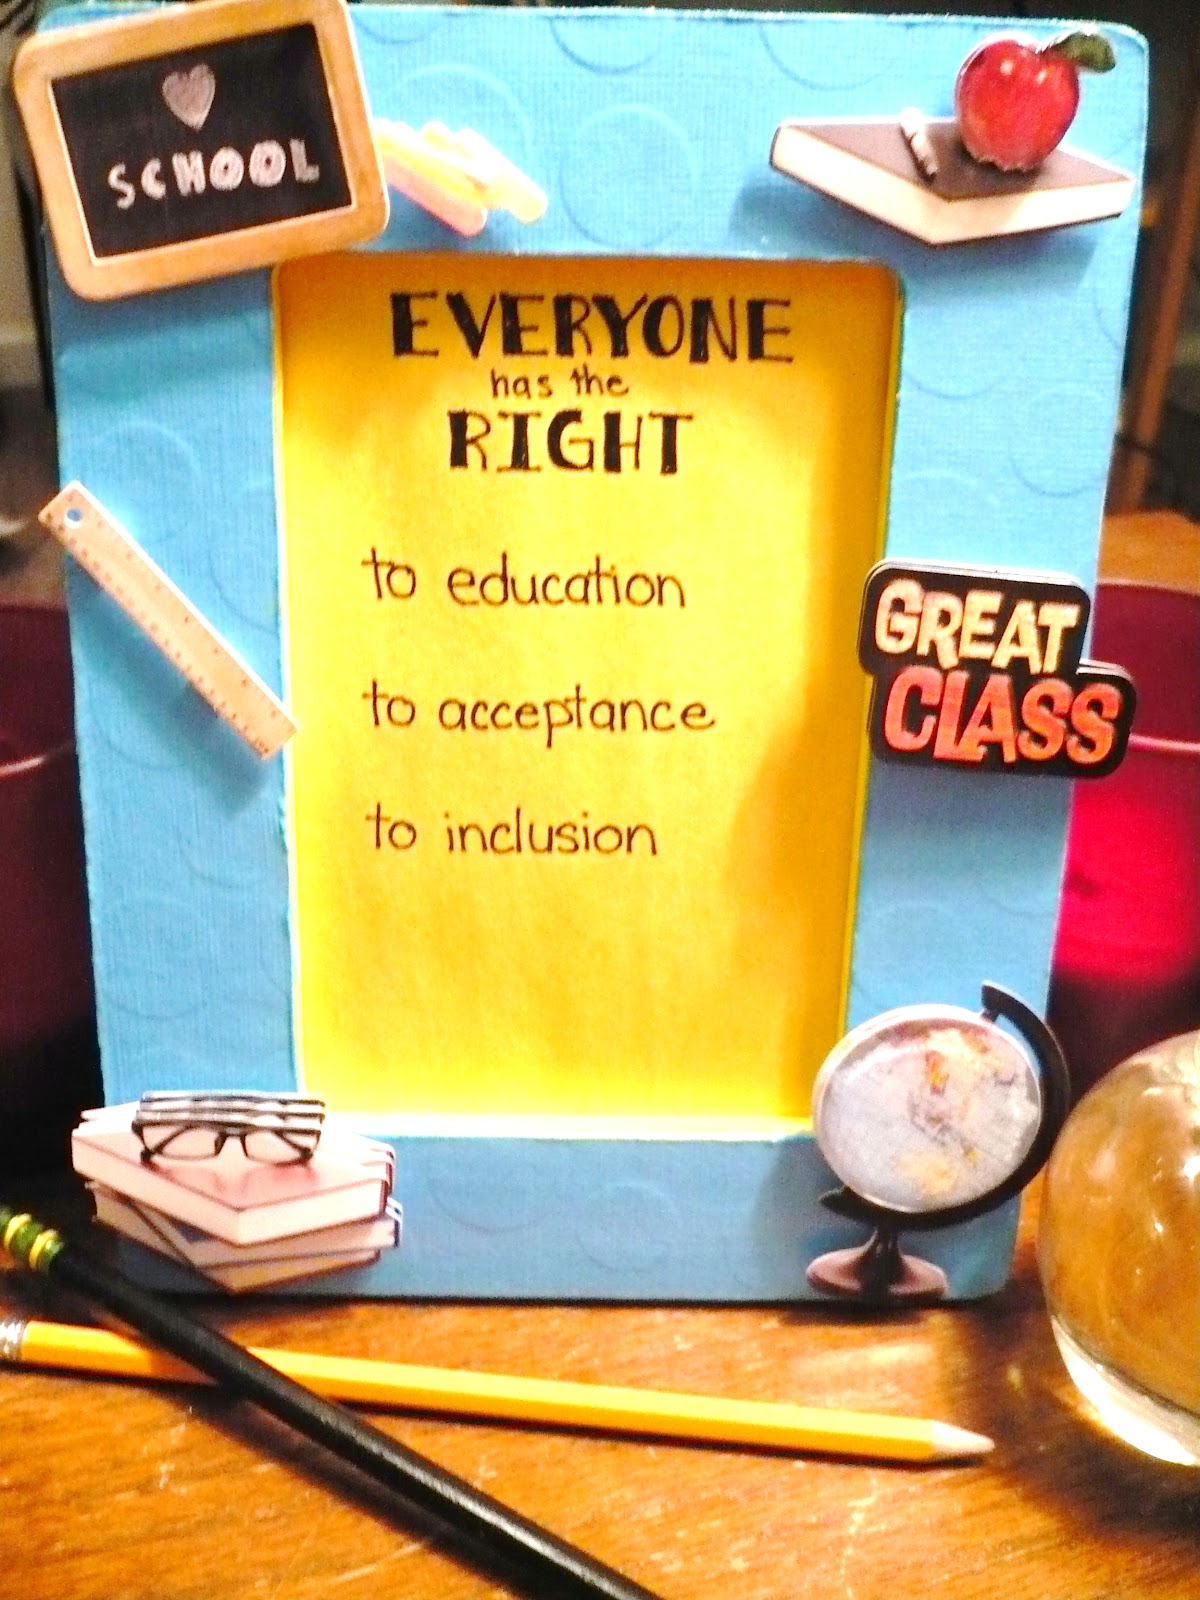
3.  I then got an assignment for one of my classes.  I had to make a "banner" (or any display) of my beliefs for inclusion.  Well, here I had this picture frame that had been sitting around.  Why not use it for this assignment instead?  So I bought some scrapbooking stickers to decorate it.  And then I lost the stickers.  I tore apart my apartment three times over searching for them.  So change from plan three to plan...
4. was just a change in the stickers I used.  I bought new ones from Michaels today.  And decided I should probably use them immediatly so that I don't loose them again.  After all, this is due Wednesday.
Here are my materials:
  • Wooden picture frame
  • Scrapbook paper
  • Exacto-knife
  • Pencil
  • Paint
  • Mod Podge
  • Brush for paint
  • Brush for mod podge
  • Any other decorations your heart desires

First things first- paint the parts of the frame that will be showing.  For me this was the sides and the inner part of the frame.  The main front part will later be covered by my paper.

Next I traced my frame on my paper.  Sorry about the blurry photo, but I think you have the idea.

Use your handy dandy exacto-knife to cut out the paper.  Perfect!


 Mod podge that sucker down.  LET IT DRY!  I got impatient at this point, which caused me to make a pretty obvious mistake (obvious, that is, if I took good pictures).  After it's dry, you will want to file down the paper so that it fits flush to the frame.  I used a nail file.  If you don't let it dry all the way you'll end up bringing up parts of the paper.  I fixed this later by putting a sticker on top of it.
When the paper is perfectly set, put a couple of coats of mod podge on the top.  I also coated the sides that I painted so that it would have that pretty glossy appearance all over.

After it's completely dry, add the embellishments (before you loose them).  I love these 3D stickers.  They were 40% off, and I had a coupon for an extra 25% off.  Can't beat that! 
And here it is completely finished!  I hand wrote my beliefs on construction paper, which I then coated with mod podge.  My other plan was to laminate it, but I figured I had mod podge with me, while I would have to go somewhere else to pay for laminating.

I'm happy with how it turned out, although I'm not sure if I'm going to leave my inclusion stuff inside or if I'm going to change it out for something else when I actually bring it into my life.

Tuesday, April 3, 2012

Magnetic Glass Whale

Internet's working again!

I know, took long enough.  You'd think that the exorbitant amount I'm paying to live here would mead adequate internet, but no.  Finally, though, it's up and actually letting me load pictures, so maybe I now can get on with my life.

Which includes... I just got back my Praxis II score for Elem. Ed. Content Knowledge! I got a 191, which is in the top 15 percentile.  Can I just tell you I'm a little stoked?  I am just that much closer to my teaching certificate.  Now to get myself on task and actually fill in those job applications...

To show you how responsible I am, here's the craft I did this weekend instead of homework!

Awww!  So cute!


It's a little magnetic whale!  The perks of having a roommate taking glass blowing is you get sweet little chatskies that you can mess with.


So here's the shape Nicole gave me.  She was so excited that she accidentally made a whale, and I was so excited that she gave it to me!


I decided that it was about time for me to play with my tissue paper.  I picked through my stash and found this pretty teal-ish color.  I thought it looked very appropriate for a whale.

I tore the paper into little bits.  When Mod Podging it, I placed them down one by one on the glass.  It's much less frustrating if they're pre-torn.
Layer that glass piece with Mod Podge.

And place down your tissue paper.  This will be the back of your magnet.  I was sure to rub them down as I went, and I applied another layer of Mod Podge when I was done.


Then I decided that I wanted some more colors.  I grabbed a dark blue piece of tissue paper and repeated the above steps with the new color.


This is the back of the final product....


And this is the front!  I'm so glad I added that second layer of color.  It really makes the ocean feel I was going for.  Nicole said I should add eyes, but I like it as it is.  I tend to add too much detail.


After that, all you have to do is glue on the magnet.  I used an extra strong one (this is one magnet which could cause issues if it dropped off the fridge) and used a cold glue gun.  I would recommend using something like gorilla glue instead just because it would be easier.


And here's the final product!  Among Nicole's psychology word magnets...


By my freakishly cute birds I bought at Michael's...


And on our dry erase board on the fridge in the kitchen!  Gosh, he travels!

I'm lucky to have a roommate who brings me her mess-ups from class.  If you're not lucky like me, you can use the same idea to decorate glass plates, the bottom of glass cups, even the back of those little flat sided glass marbles!  If I was doing something like that, however, I would try to find a spray sealant made for glass.  The tissue paper on the back of my whale would easily peal off if I messed with it, which made it easy to clean up the edges but would mean death if it was something that was frequently messed with.

I'd love to hear any other ideas you might have, especially as Nicole keeps sending home more bits of glass shapes for me to use.  How else can I decorate them?  Please share in the comments!