Today I made another cute bracelet!
I got my inspiration here. I tried to make this bracelet, but it just didn't turn out right. Then I decided, hey! You know what? I like four braids a lot, so I wanted to incorporate the nuts into that instead. I love how it turned out! I had the string in my stash of craft supplies, and the nuts cost $1.19 at Lowes for a pack of 24. I have a lot more crafts I can do!
First, cut two long pieces of string. I generally cut a lot more than I need, so I'm not going to give you advice on how much to cut.
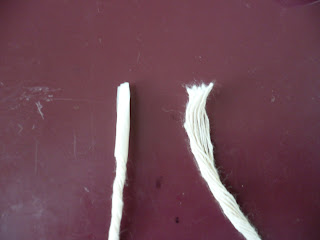
Then I taped the end of my string. That will make it easier later on to to thread the nut. See the one on the right? And that's even BEFORE I start threading and braiding!
I doubled my string and tied a knot in the top. Leave a loop- this is where you'll eventually be closing your bracelet. Make it large enough for whatever clasp you're using. I often use a knot on the other end as the closure, but this time I used a spring clasp. You can also use charms like in this post, buttons, or beads. Be creative!
I used a clip board to hold my braid in place. Made life so much easier!

When doing this braid, just think of it as a normal three-string braid. Each string will be doing an under, over, under, over, etc. pattern.

I'm going to let the pictures speak for themselves. I hope you can follow along!


Now for adding the nuts! String the nut onto one of the strings that is in the center at that point. .

Then take the other center string and thread it through the other way so that the nut is anchored in place
Then continue the braid like before, crossing over the strings to hold the nut in place.
I decided to add a nut with one braid between each one. You do the same thing as before.

I did a total of 5. I like those odd numbers!
After you get all your nuts there, finish braiding so that it's as long as you need.

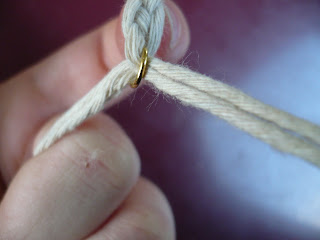
I had to add a jump ring at the end in order to add my spring clasp. I threaded the string through the jump ring and tied it in place.
I used Unique Stitch to add extra reinforcement to my knot. I don't trust myself with making knots.
The spring clasp wouldn't fit around the string, so I did a Chinese staircase around it to hold it closer together, and add a jump ring for attaching it.

And the finish product! I'm pretty happy with it, and it's such a comfy, lightweight bracelet.

I like the unexpected pop of color added by the Chinese staircase! Kept it all neat and tidy.
My mother and brother just headed out today to visit a law school and won't be back until Sunday, so I have a lot of time to be productive. And by productive I mean do crafts. And read. And sleep.
I would love to see what you all do! If you make your own version, I'd love to see them in the comments!


No comments:
Post a Comment