Saturday, May 19, 2012
Graduation!
Sorry, anyone reading my blog, but I don't think I'll have time to do a craft this weekend. I'm officially no longer a poor college student. I'm a poor just-graduated person instead! Got my B.S. in Elementary Education today, and I will be going to my brother's graduation tomorrow. Hopefully I'll be able to do some stuff next week when I'm waiting by the phone for substitute teaching jobs.
Saturday, May 12, 2012
Chain and Bead Bracelet
Today, instead of studying for finals, I went shopping. Got clothes for graduation (one week away!) and yes, craft supplies. I made two bracelets tonight, neither of which will go with what I'm wearing on my big day, but both of which I will want to wear.


Anyone want to guess my favorite color?
I've had this thing for years...

My mom gave me a bunch of costume jewelry when I was just beginning to make jewelry. I have no idea what this thing used to be, but it inspired me. That chain would totally make an awesome bracelet! So I removed all the 80s bling so that I'd just have the chain. I have ideas for the pink things later on in life.

I used a bead tip to connect the chain with stretchy string. To keep the string in I just knotted it a few times and used a super glue to hold it all together. Better pictures coming soon.

So here's the threaded stuff. I also added a charm that I had laying around, because I feel like they add that special something to crafts. Notice the threaded bead tip.
 Finished product! I love that it has the mix of materials, and because the chain is flat it's comfortable to type while wearing (yes, I'm wearing it while typing...)
 |
| Glamour shot! |

I found these green beads at JoAnns when I was home for Spring Break. They're the perfect weight for a bracelet, and the most gorgeous green.
Finals are coming up, and have me stressed out of my gourd. I'm annoyed because I only have one legit test, and it's on the first day of exams. But I guess then I'm pretty much done. And I won a raffle for 20 games of laser tag so the day before graduation Nicole, her boyfriend her brother, her best friend, my brother, and I are going to go to war, boys vs. girls style. Nicole told me she's a sniper, so maybe she'll level out my complete inability to play.
Saturday, May 5, 2012
Mod Podged Picture Frame
Happy Cinco de Mayo! As promised, I have a new post this week. And a doozie of a story. I bought a $1 picture frame from Michaels a few months ago, and my plans for it have changed four times now. Let me walk you through my mind...
1. I was going to use comic strips to decorate it. Have them overlapping, a cool collage. This will probably happen in the future, but collecting the comics was getting moderately daunting.
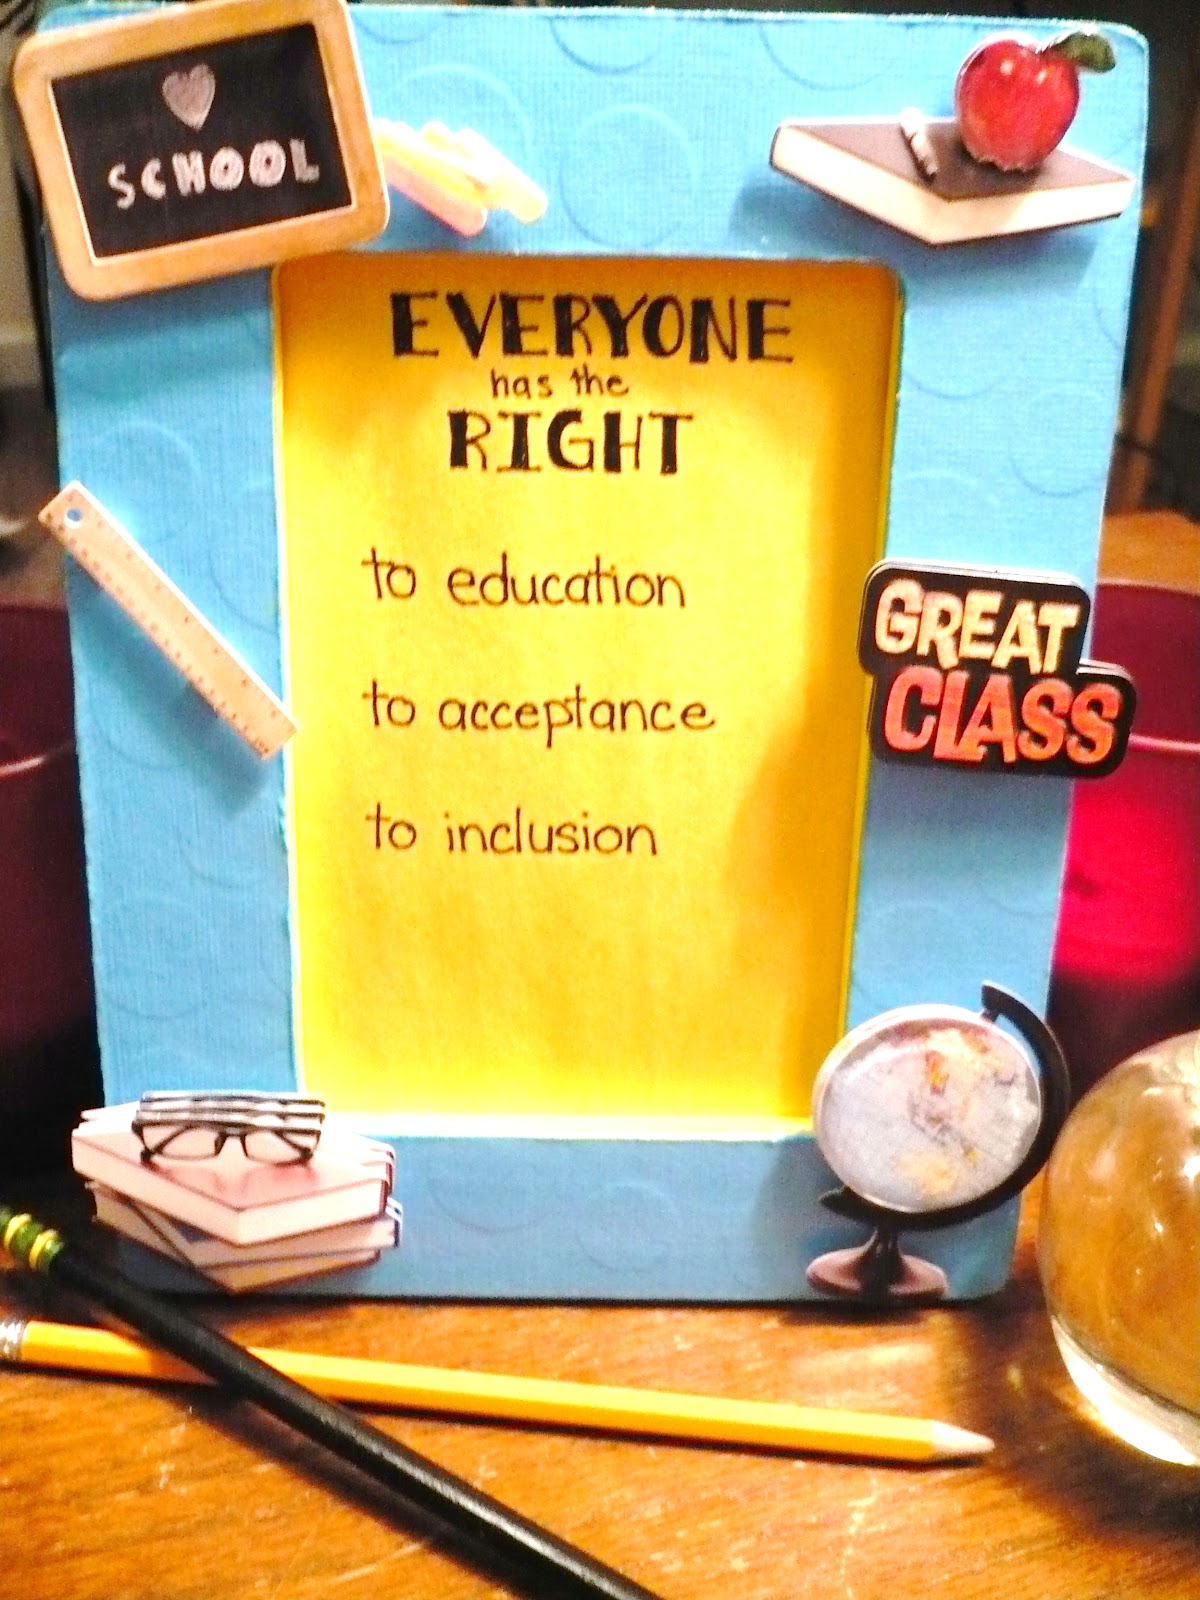
2. I decided that I wanted to use it somehow in my future classroom, so I found a bunch of inspirational education quotes. I was going to mod podge them onto it, then have my "teacher rules" in it. I love it when teachers display what rules they'll follow (e.g. I will respect you, I will put in my most effort to reach your needs, etc.).
3. I then got an assignment for one of my classes. I had to make a "banner" (or any display) of my beliefs for inclusion. Well, here I had this picture frame that had been sitting around. Why not use it for this assignment instead? So I bought some scrapbooking stickers to decorate it. And then I lost the stickers. I tore apart my apartment three times over searching for them. So change from plan three to plan...
4. was just a change in the stickers I used. I bought new ones from Michaels today. And decided I should probably use them immediatly so that I don't loose them again. After all, this is due Wednesday.

Here are my materials:
- Wooden picture frame
- Scrapbook paper
- Exacto-knife
- Pencil
- Paint
- Mod Podge
- Brush for paint
- Brush for mod podge
- Any other decorations your heart desires

First things first- paint the parts of the frame that will be showing. For me this was the sides and the inner part of the frame. The main front part will later be covered by my paper.


Next I traced my frame on my paper. Sorry about the blurry photo, but I think you have the idea.

Use your handy dandy exacto-knife to cut out the paper. Perfect!


After it's completely dry, add the embellishments (before you loose them). I love these 3D stickers. They were 40% off, and I had a coupon for an extra 25% off. Can't beat that!
And here it is completely finished! I hand wrote my beliefs on construction paper, which I then coated with mod podge. My other plan was to laminate it, but I figured I had mod podge with me, while I would have to go somewhere else to pay for laminating.
Wednesday, May 2, 2012
Avengers Nails, Coffee Stained Paper
Sorry I missed two weekends! The semester is wrapping up for me, my camera's on the fritz, and I've been applying for jobs. I think those are decent excuses.
I will hopefully be able to post a couple of crafts this weekend, but to make up for the dry spell I have my roommate's nails!


And there you go! I hope this makes you all a little bit okay with my break, and I will be sure to put a more sufficient post up this weekend.
I will hopefully be able to post a couple of crafts this weekend, but to make up for the dry spell I have my roommate's nails!
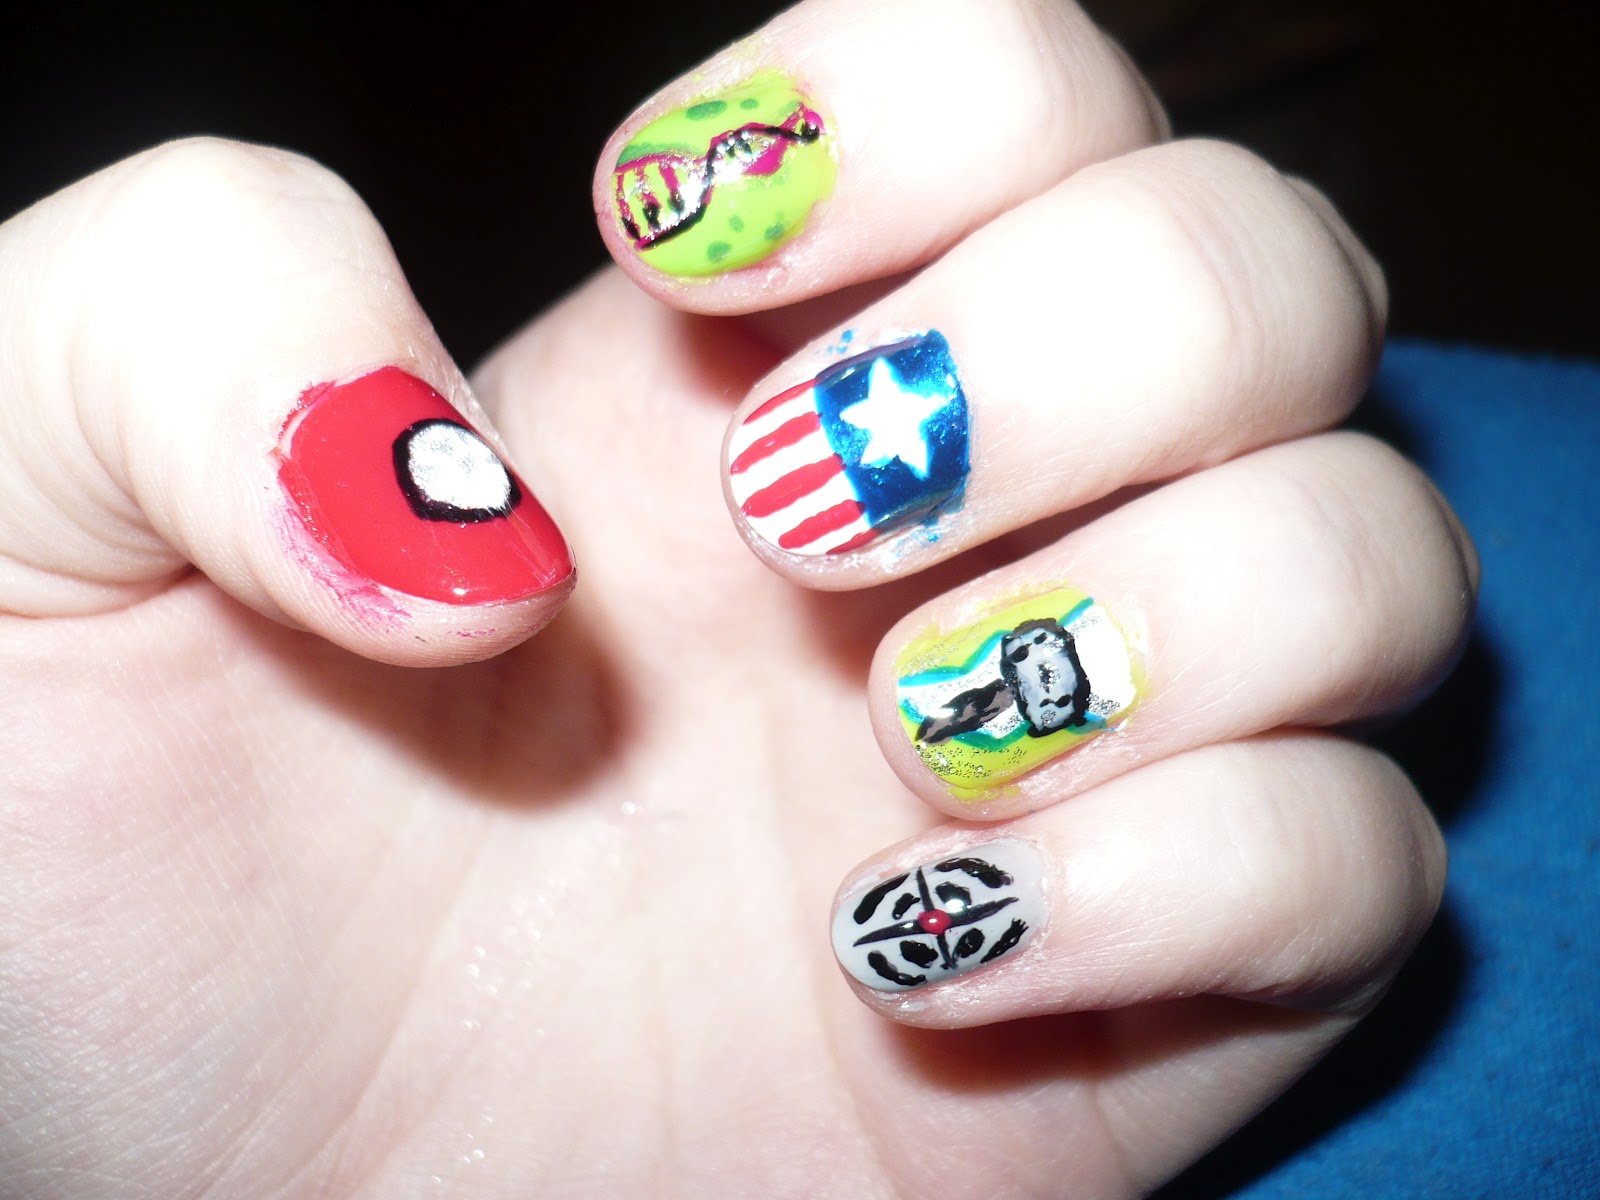
Guess what movie she has midnight premier tickets for? She's so proud of herself, and we have plans to paint our mascot on our nails for graduation. Everyone will be ultra jealous.

And more on the crafty(ish) side, I made these for a class of mine. I did a project in a group where we taught other students about Ronald Morrish's philosophy. We had a pirate theme, and I was doing consequences. My station was called "Walk the Plank!" It was completely adorable, and the first time I've ever done stained paper.
Here's what you need:
-One pot of coffee (I used instant)
-One cookie sheet
-One hair dryer or the patience and space for laying them out and letting them dry
Steps:
1. Make a pot of very strong coffee.
2. Pour the coffee into the cookie sheet.
3. Take your paper and lay it flat in the cookie sheet. Make sure you submerge it. Let it sit for a little while.
4. Take out the paper and use the hair dryer to dry it. While doing this, have another sheet of paper in the coffee.
5. Repeat until you're all set!
This will get you a basic piece of stained paper. I took it one step further and burned the edges. This was a very tedious process because I was scared to death of catching my apartment on fire. I slowly brought the paper back and forth above the flame of a candle, keeping it a few cm above the flame. This takes a LONG time, but it adds so much!
And there you go! I hope this makes you all a little bit okay with my break, and I will be sure to put a more sufficient post up this weekend.
Subscribe to:
Comments (Atom)